Introduction
At a Glance
Regular slotted container (RSC) case hand is one of those things that may have never crossed your mind until now. But it’s important that you get it right, because it needs to match your case erector configuration. If it doesn’t, you’ll have an erector that won’t form your cases.
Here’s the steps to identify case hand:
- Identify which panel is larger on a knocked-down (KD) case
- Answer the question: “Is the larger panel on the right or the left?”
- And whichever side it’s on, that’s the RSC case hand
And if you really want to do things right, check, re-check, and then maybe get a few other opinions too – especially your manufacturer’s.
If you’re looking to sign a purchase order (PO) for an automatic case erector, you’ve likely run into a question that came as a surprise: “Are your cases right- or left-handed?”
Regular slotted container (RSC) case hand is pertinent to original equipment manufacturers (OEMs) and corrugate suppliers, but really not all that relevant to anyone else. Once you’re dealing with an OEM, all of a sudden, RSC case hand is your concern too.
Why? Because it plays a part in determining your machine configuration and making sure your erector runs properly.
In this article, we’ll cover:
- RSC case anatomy and terminology
- How to identify your own case hand
- Steps to doublecheck and evaluate your cases
- Why case hand determines machine configuration
What Is an RSC Case? A Brief Box Anatomy Lesson
As a starting point, let’s briefly go over the anatomy of an RSC case. An RSC is the most standard case in the world. It’s typically made from corrugate, which has two layers of linerboard with fluting in between (see the diagram below).

RSC Terminology:
- Panel – Refers to the large, main walls of the RSC (what will be the sides of your case)
- Flap – Refers to the folding pieces of the RSC, made with score lines for squareness
- Slot – Refers to the cut gaps between the flaps, which allow for flap folding
- Manufacturer’s Joint – Refers to a small tab which overlaps when the panels are sealed into knocked-down (KD) format

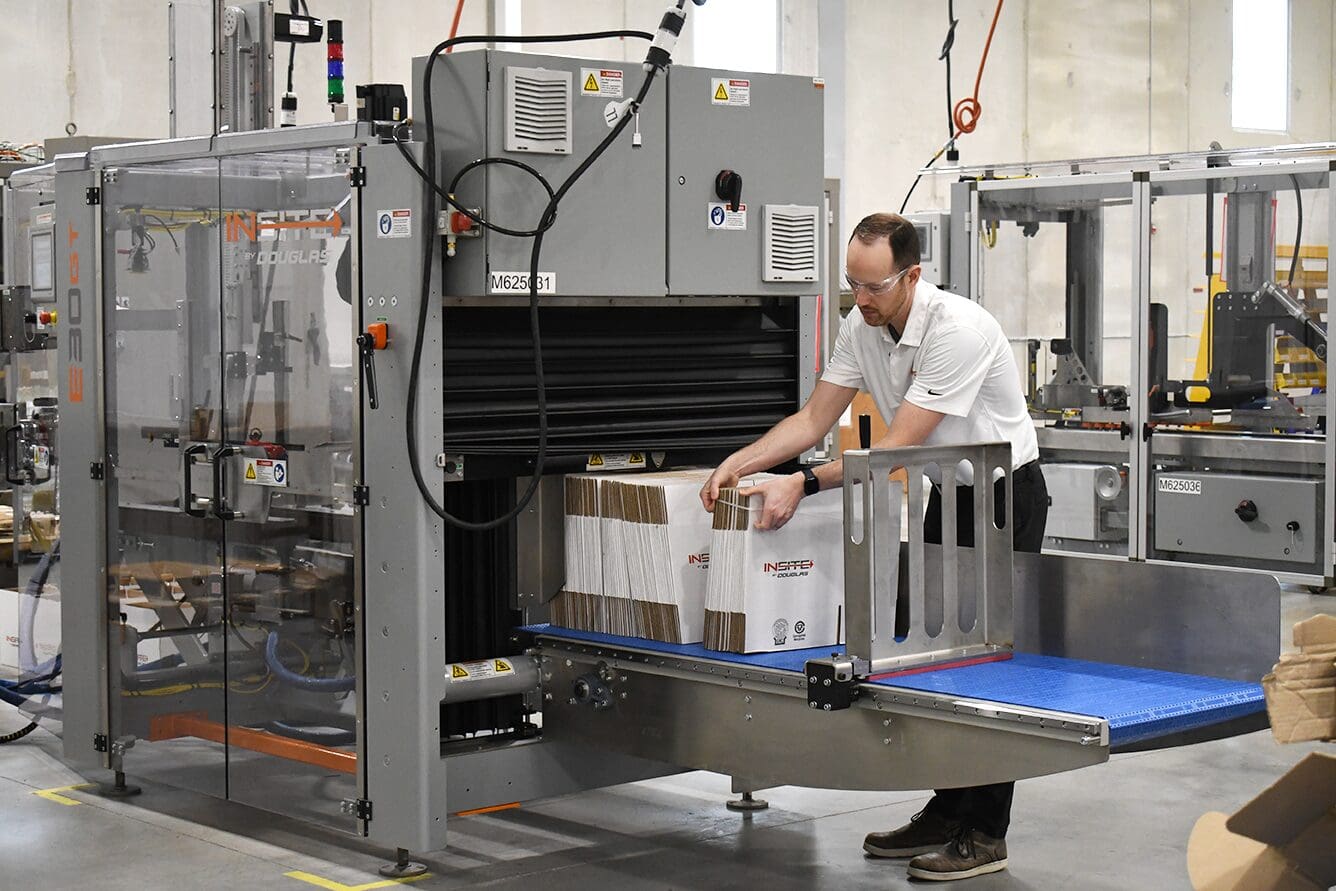
With case erectors, the RSC is typically loaded in KD form. This means that the cases appear flat, with panels connecting and flaps laying open. This is how the cases appear when they are delivered to your facility. The erector does the work of taking the KD, forming the case and sealing one set of flaps.
The flaps of an RSC are all the same length, and they’re broken into “major” and “minor” flaps. These titles dictate which flaps are on the exterior vs. interior of the finished case. In other words, the sequence the flaps are folded in. RSC flaps meet in the middle when folded, or sometimes, they have a slight gap to save on corrugate.
How Do I Determine RSC Case Hand?
Now, to determine case hand: there are two ways to do this. The first outlines procedures with a physical case in possession. The second outlines procedures through a case drawing or print from the supplier.
Working with a Physical Case in Your Possession
On a KD case, there will be two longer panels and two shorter panels. The longer panels are the length of your case, and the shorter panels are the width. Two panels will be facing you – one length panel and one width panel.
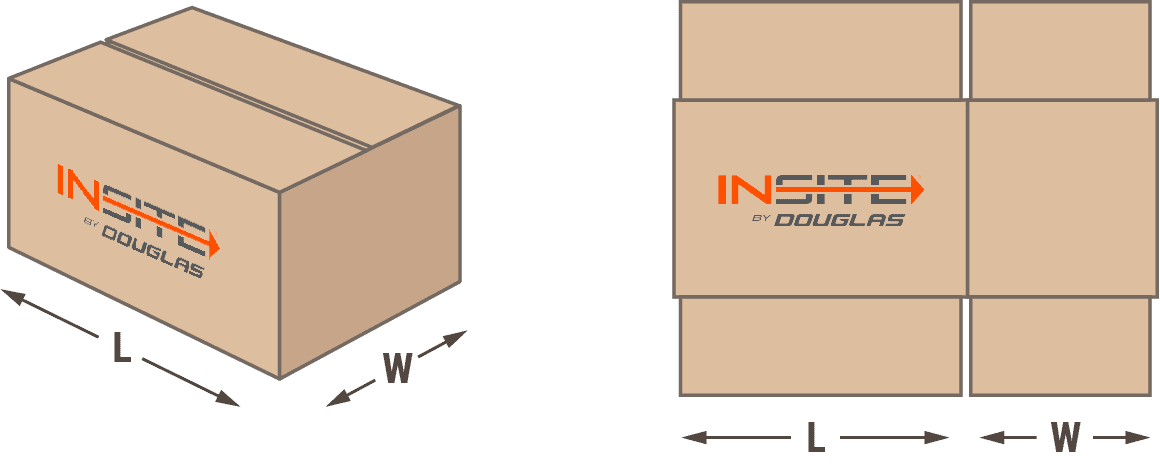
Step 1. With the KD case in front of you, ensure any printed graphics are right-side up and reading from right to left
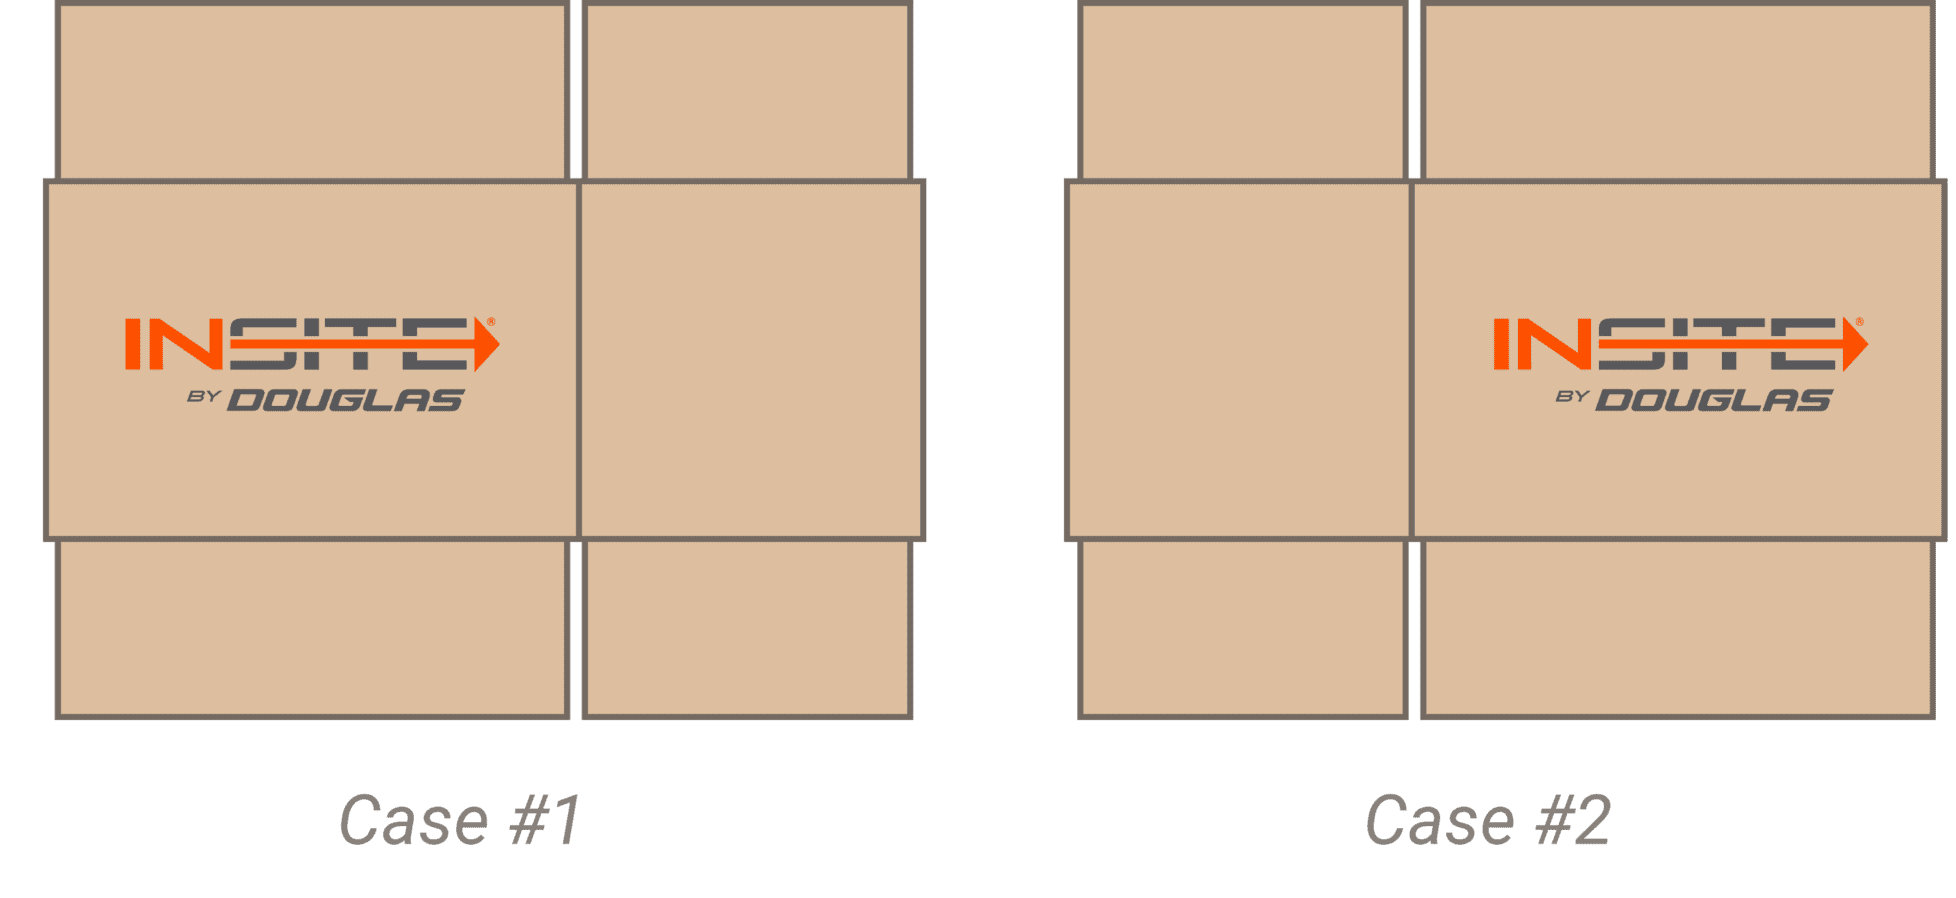
Step 2. Identify which of the two panels is larger; this is the major, length panel
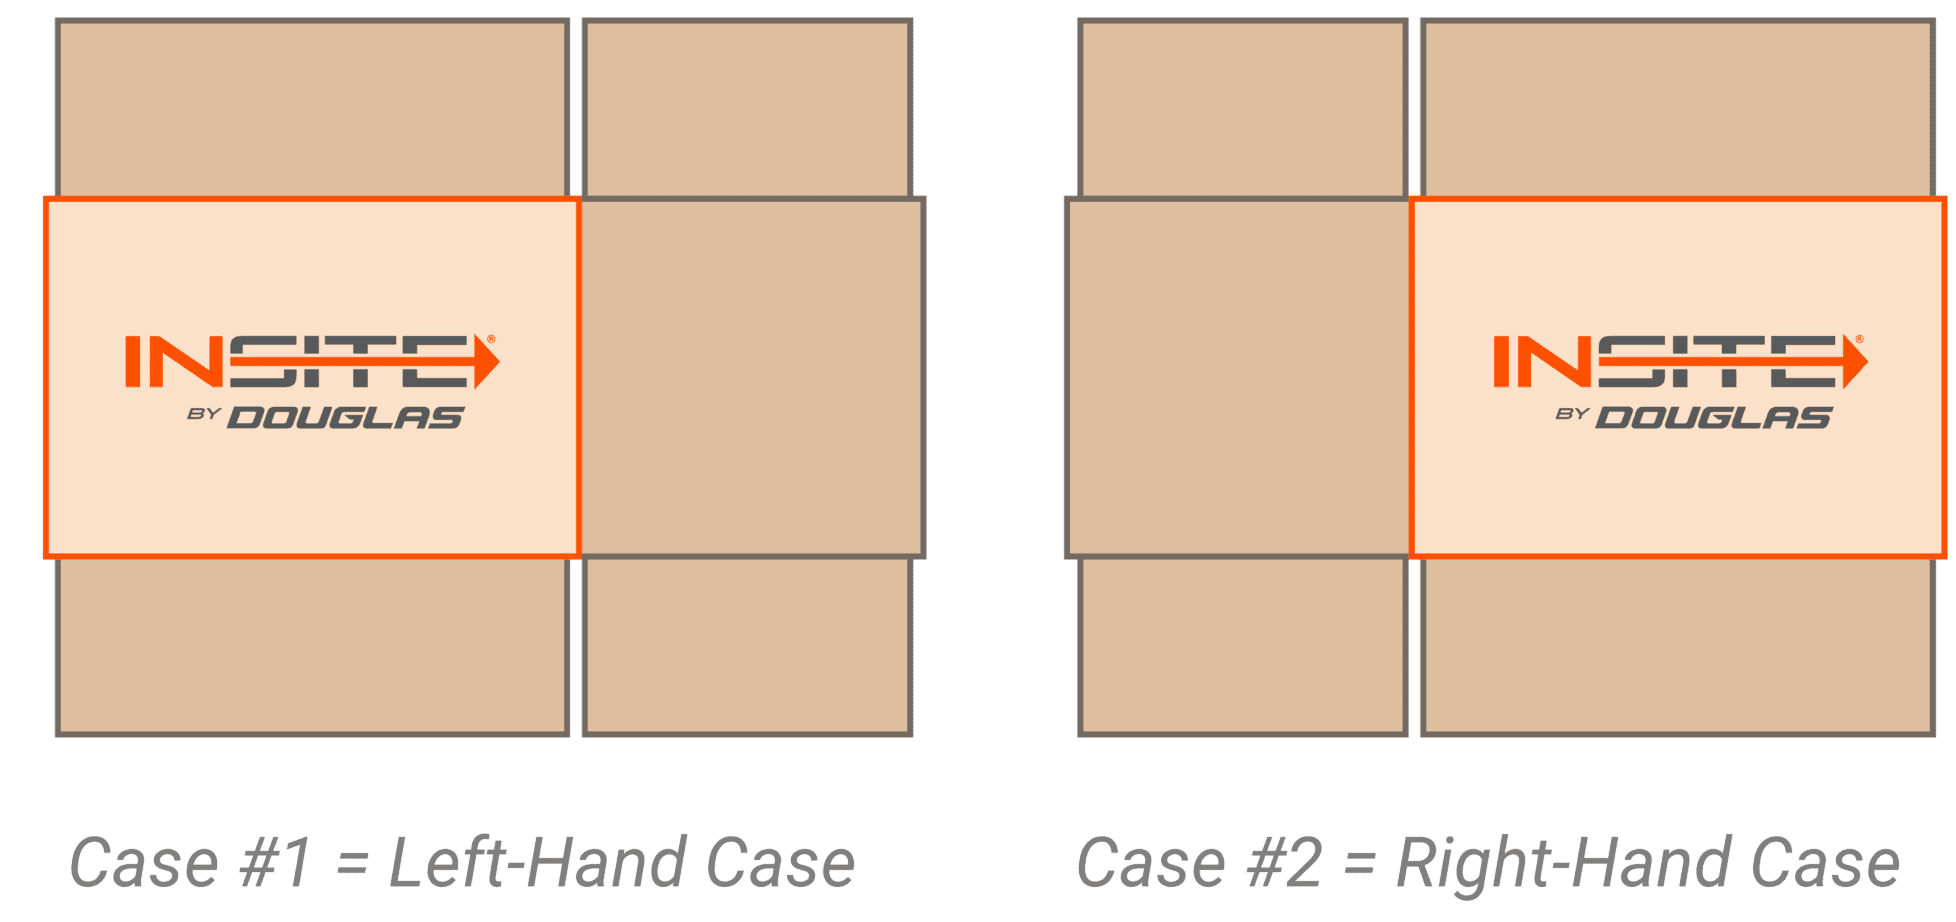
Step 3. Note which side of the case the length panel is on:
- On the right – It’s a right-hand case
- On the left – It’s a left-hand case
Working with a Case Drawing or Print from the Supplier
1. Identify what you’re looking at
Determine whether the drawing shows the inside or outside of the case. Sometimes this is labeled (e.g. “printed”). If it’s not clear, use the box maker’s certificate or contact your supplier for clarification.
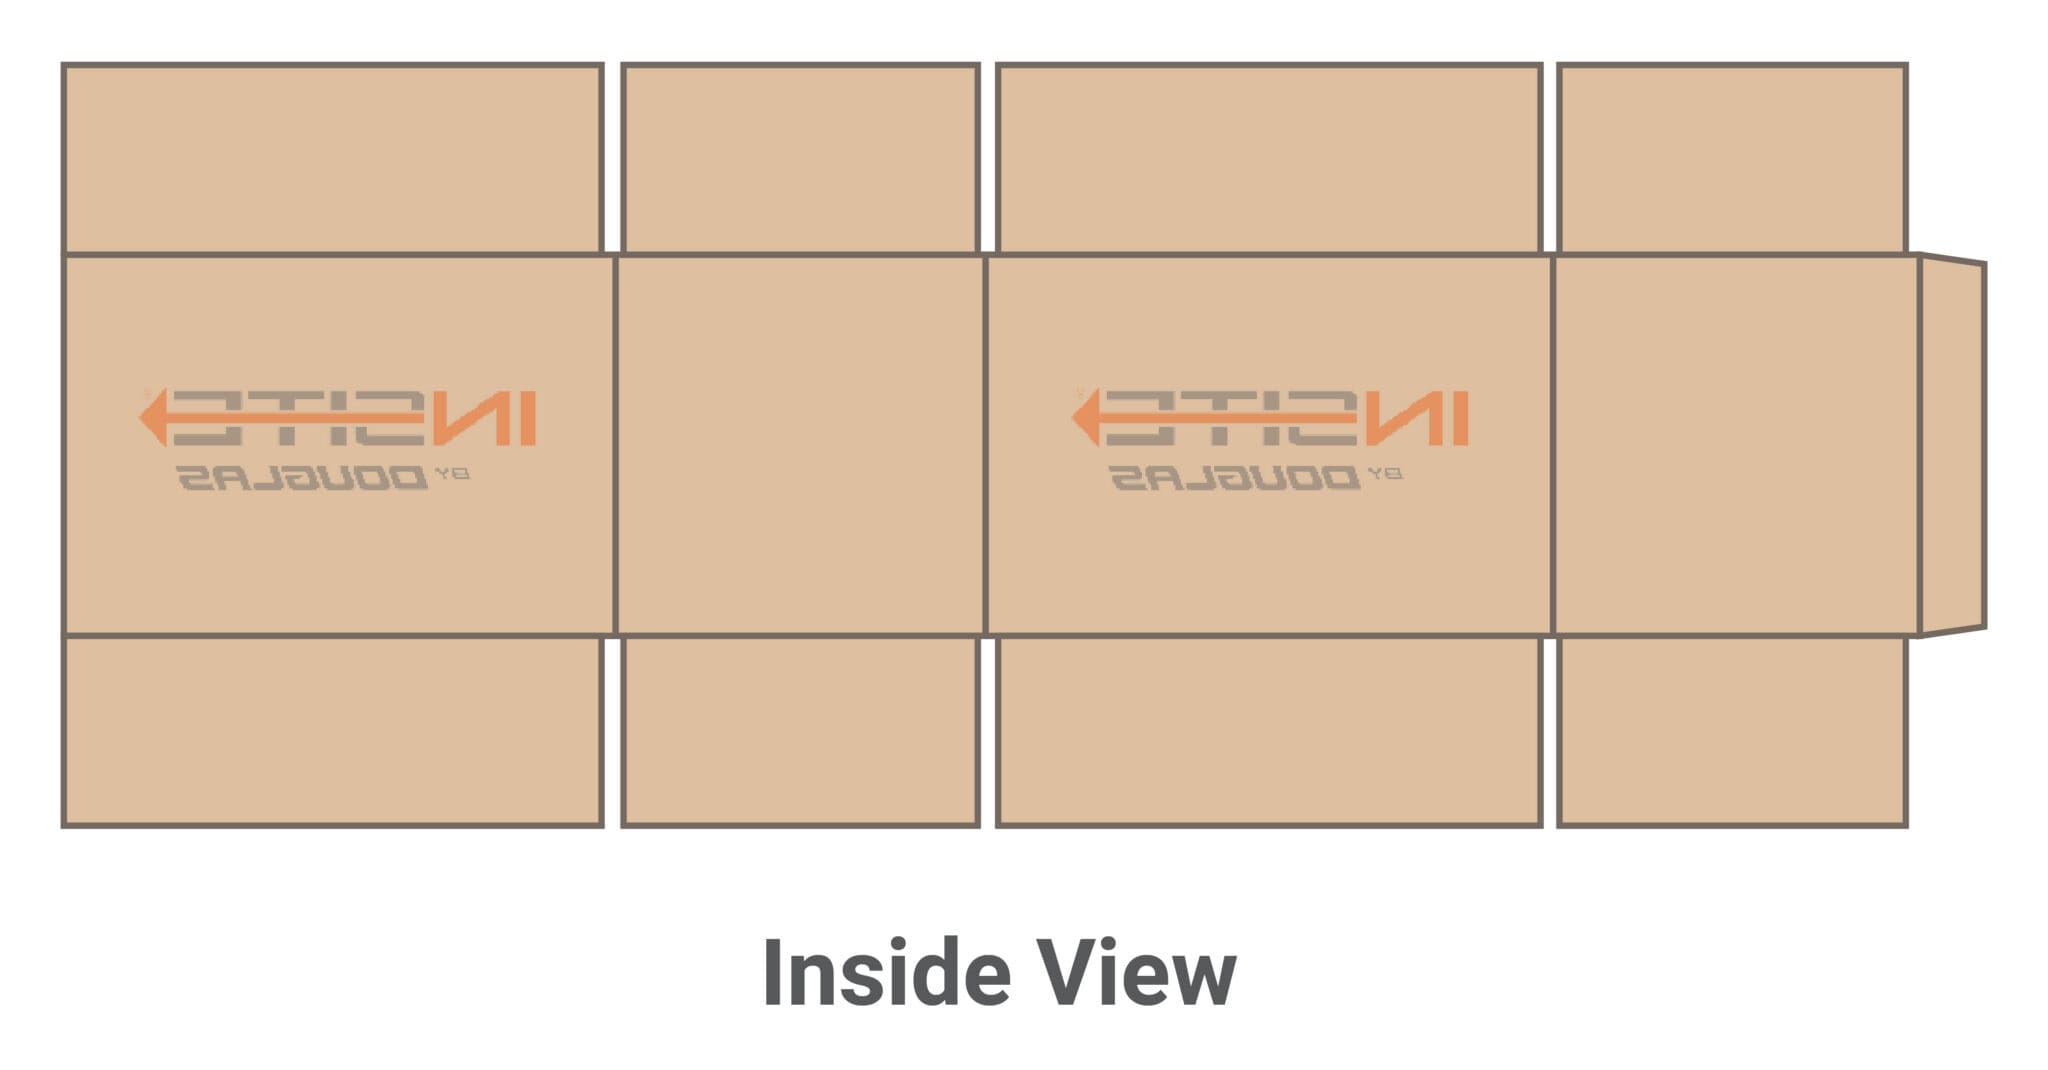
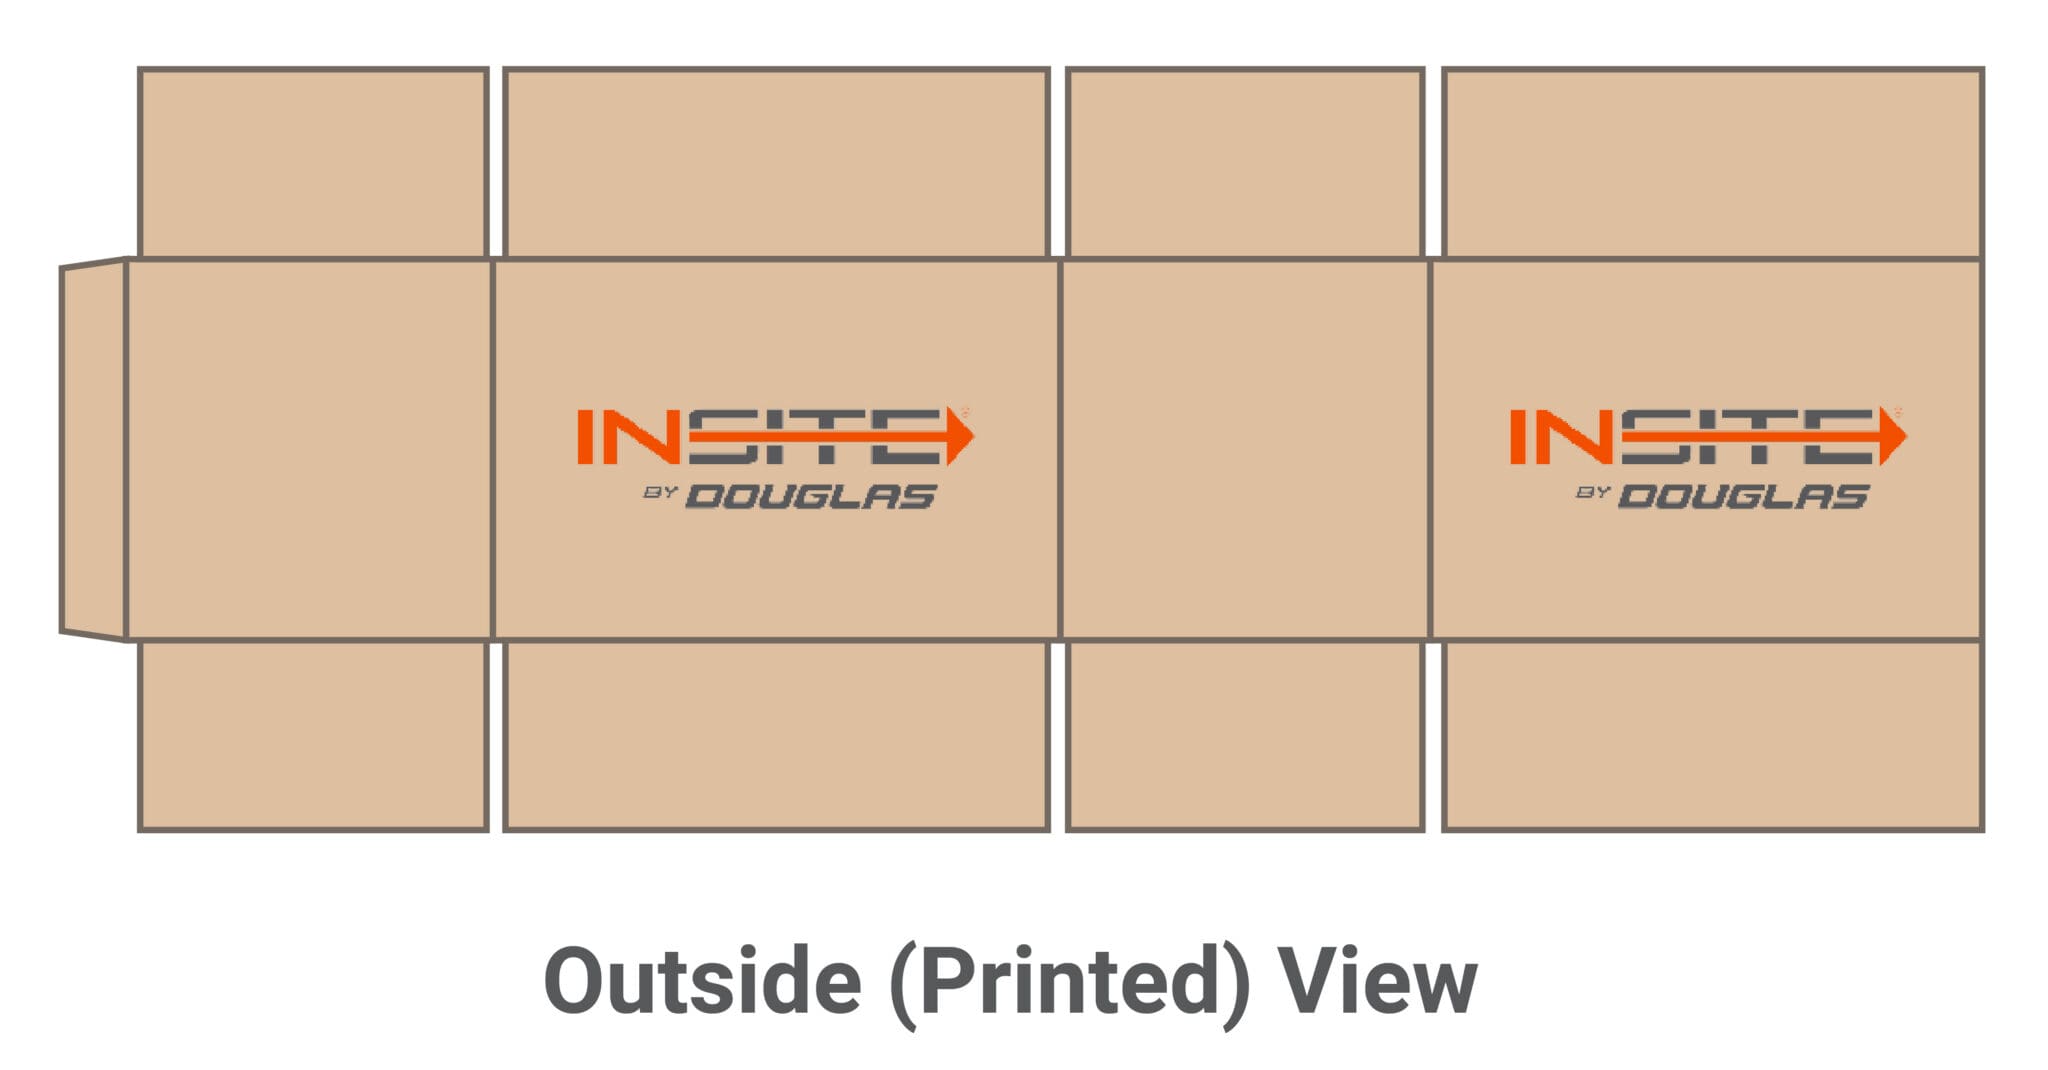
2. Visualize KD case
Either mentally or with a sheet of paper, visualize how the case will look in KD form. Locate the manufacturer’s joint (the small tab) – it can be on either the longer or shorter panels. Then fold the panels:
- If it’s an inside view – Imagine folding the end panels toward you, and meeting at the manufacturer’s joint
- If it’s an outside view – Imagine folding the end panels away from you, and meeting at the manufacturer’s joint


3. Identify the longer panel
Once you have the folded KD-format case visualized, identify which of the two panels facing you is larger. This is the major, length panel. Note which side it’s on:
- On the right – It’s a right-hand case
- On the left – It’s a left-hand case
Why Does Case Hand Matter?
Okay, so your case is right-handed (or left…). Why does it matter? Most case erectors are built to open and square cases in one direction only. And usually, the direction the machine is forming needs to correspond with the case hand. In other words, machine hand and case hand need to match.
Knowing this, most operations choose to align case hand with what best suits operator access and overall line direction. Take this example:
Cases travel from left to right through the packaging line, and the plant layout requires the operator to stand on the right side of the machine for accessibility. In order for that configuration to work, the erector needs to be right-handed, and thus, so does the case.
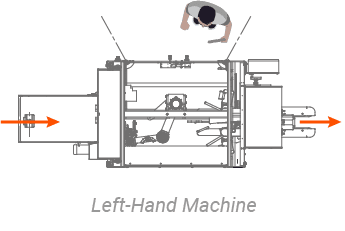
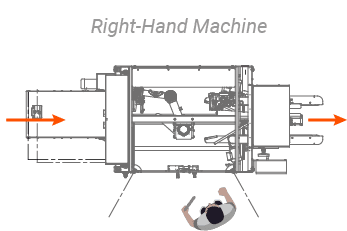
If the wrong orientation is specified, the machine won’t erect cases properly. And then the operation is faced with a choice: pay for a retrofit, prematurely upgrade, reorient the line, or do another sort of unrealistic, massive undertaking.
So, the best course of action is to check and re-check machine and case hand before signing the PO.
How Can I Make Sure My Case Hand Spec is Correct?
To doublecheck your case hand identification:
- Run through one or both of the methods outlined above (a few times)
- If possible, send a physical case sample to your OEM
- Send the corrugate supplier’s drawing/print to your OEM
- Get written confirmation of the machine configuration (machine hand) before it’s built
You might think this doublecheck is a bit overkill, but we think it’s better to be confident than sorry.
Another bonus your OEM may provide is a case evaluation. INSITE, as well as many other OEMs, will perform a detailed evaluation of your corrugate. This not only confirms your case hand, but also determines if there may be any other compatibility concerns.
One caveat here: even with an OEM evaluation, final case hand confirmation will always be your legal responsibility.
What If My Facility Runs Mixed Case Hands?
If your facility is running mixed case hands, you should standardize to either one hand or the other. It’s never a good idea to mix case hands in one plant – avoid the confusion and mistakes.
Select either right or left case hand and then work with your corrugate supplier to convert all cases to that hand. Aligning with a single case hand will reduce:
- Setup conflicts
- Changeover risk
- Erector/Case compatibility issues
Why Is Case Hand Identification So Confusing?
Whether you’ve been a victim of case hand confusion in the past, or you’re just realizing it now, you may be wondering why there’s even confusion in the first place. The reason is that case hand terminology has never been standardized in the packaging industry.
Some manufacturers define machine orientation by case panel position, and others will define it based on machine flow direction. What your OEM requires will vary.
As a result:
- “Left-hand machine” can mean different things, depending on who you’re talking to
- Verbal descriptions are risky, if they’re taken by themselves
- Even experienced professionals occasionally mislabel cases
This is why it’s not enough to say, “we need a left-hand machine,” or “we have left-hand cases.” Always, always doublecheck, and if possible, get more than one opinion.
Case Hand – The Detail You’ll Get Right
Case hand is the sort of detail that seems minor – and maybe slightly ridiculous – until you have the wrong machine configuration in your plant. Or you have hundreds of cases that won’t work with your erector.
The upside is that if you’re reading this article, you’ve probably already recognized that case hand is important. You’re one step ahead of some other operations. Just follow the methods outlined above, and stay in good communication with your OEM and corrugate supplier. If you do that, then you’ll be in a good spot when it becomes time to sign that PO.
Do You Have Questions About Case Hand or Case Erectors?
Give INSITE a call. Our specialists will answer questions and provide help where it’s needed. If you haven’t decided on an erector yet, consider INSITE and receive service and support 24/7.