Introduction
If you’re investing in an INSITE case erector, you’re probably asking a very practical question:
How hard is this going to be to install — and what’s it going to cost me?
You don’t want surprises. You don’t want a machine sitting on your floor for days because something wasn’t ready. And you definitely don’t want hidden installation costs that weren’t discussed or understood upfront.
The good news?
INSITE erectors are designed to be straightforward to install, whether you choose to self-install or bring in a service technician. In fact, in most cases customers are running cases in about two hours after the machine is set in place.
In this article, we’ll break down:
-
What’s required for INSITE erector installation
-
A realistic installation timeline
-
What it costs to self-install vs. use a technician
-
When bringing in a service tech makes sense
INSITE Erector Installation Requirements
Before your machine ever arrives, there are a few things you’ll want to have ready. This applies whether you’re self-installing or using a service technician.
Equipment and Tools for Unpacking and Placement
You’ll need the following in-house and ready for use:
Electrical Requirements
-
3-Pole 480V power
-
30 / 60 Hz
-
Fused at 15 AMP
-
Separate drop required for glue tank (if glue model)
You will need a certified electrician to complete this connection. Even if you bring in an INSITE technician, electrical hookup must comply with local/state regulations, many of which require state-certified professionals.
Air Requirements
-
Minimum 5.3 SCFM
-
Minimum 70 PSI
-
¼” NPT male threaded fitting
The facility air line connects to the manual dump valve on the operator side of the enclosure.
Line Integration & Space
Before installation day, you should:
-
Identify final machine location
-
Ensure adequate floor space
-
Confirm downstream conveyor alignment
-
Plan for discharge photo eye placement
The HMI will even calculate the minimum distance for discharge photo eye mounting once you enter conveyor speed.
INSITE Erector Installation Timeline (Step-by-Step)
So how long does this actually take?
Assuming your power and air drops are already in place, here’s a realistic breakdown for a first-time self-install on an E30T:
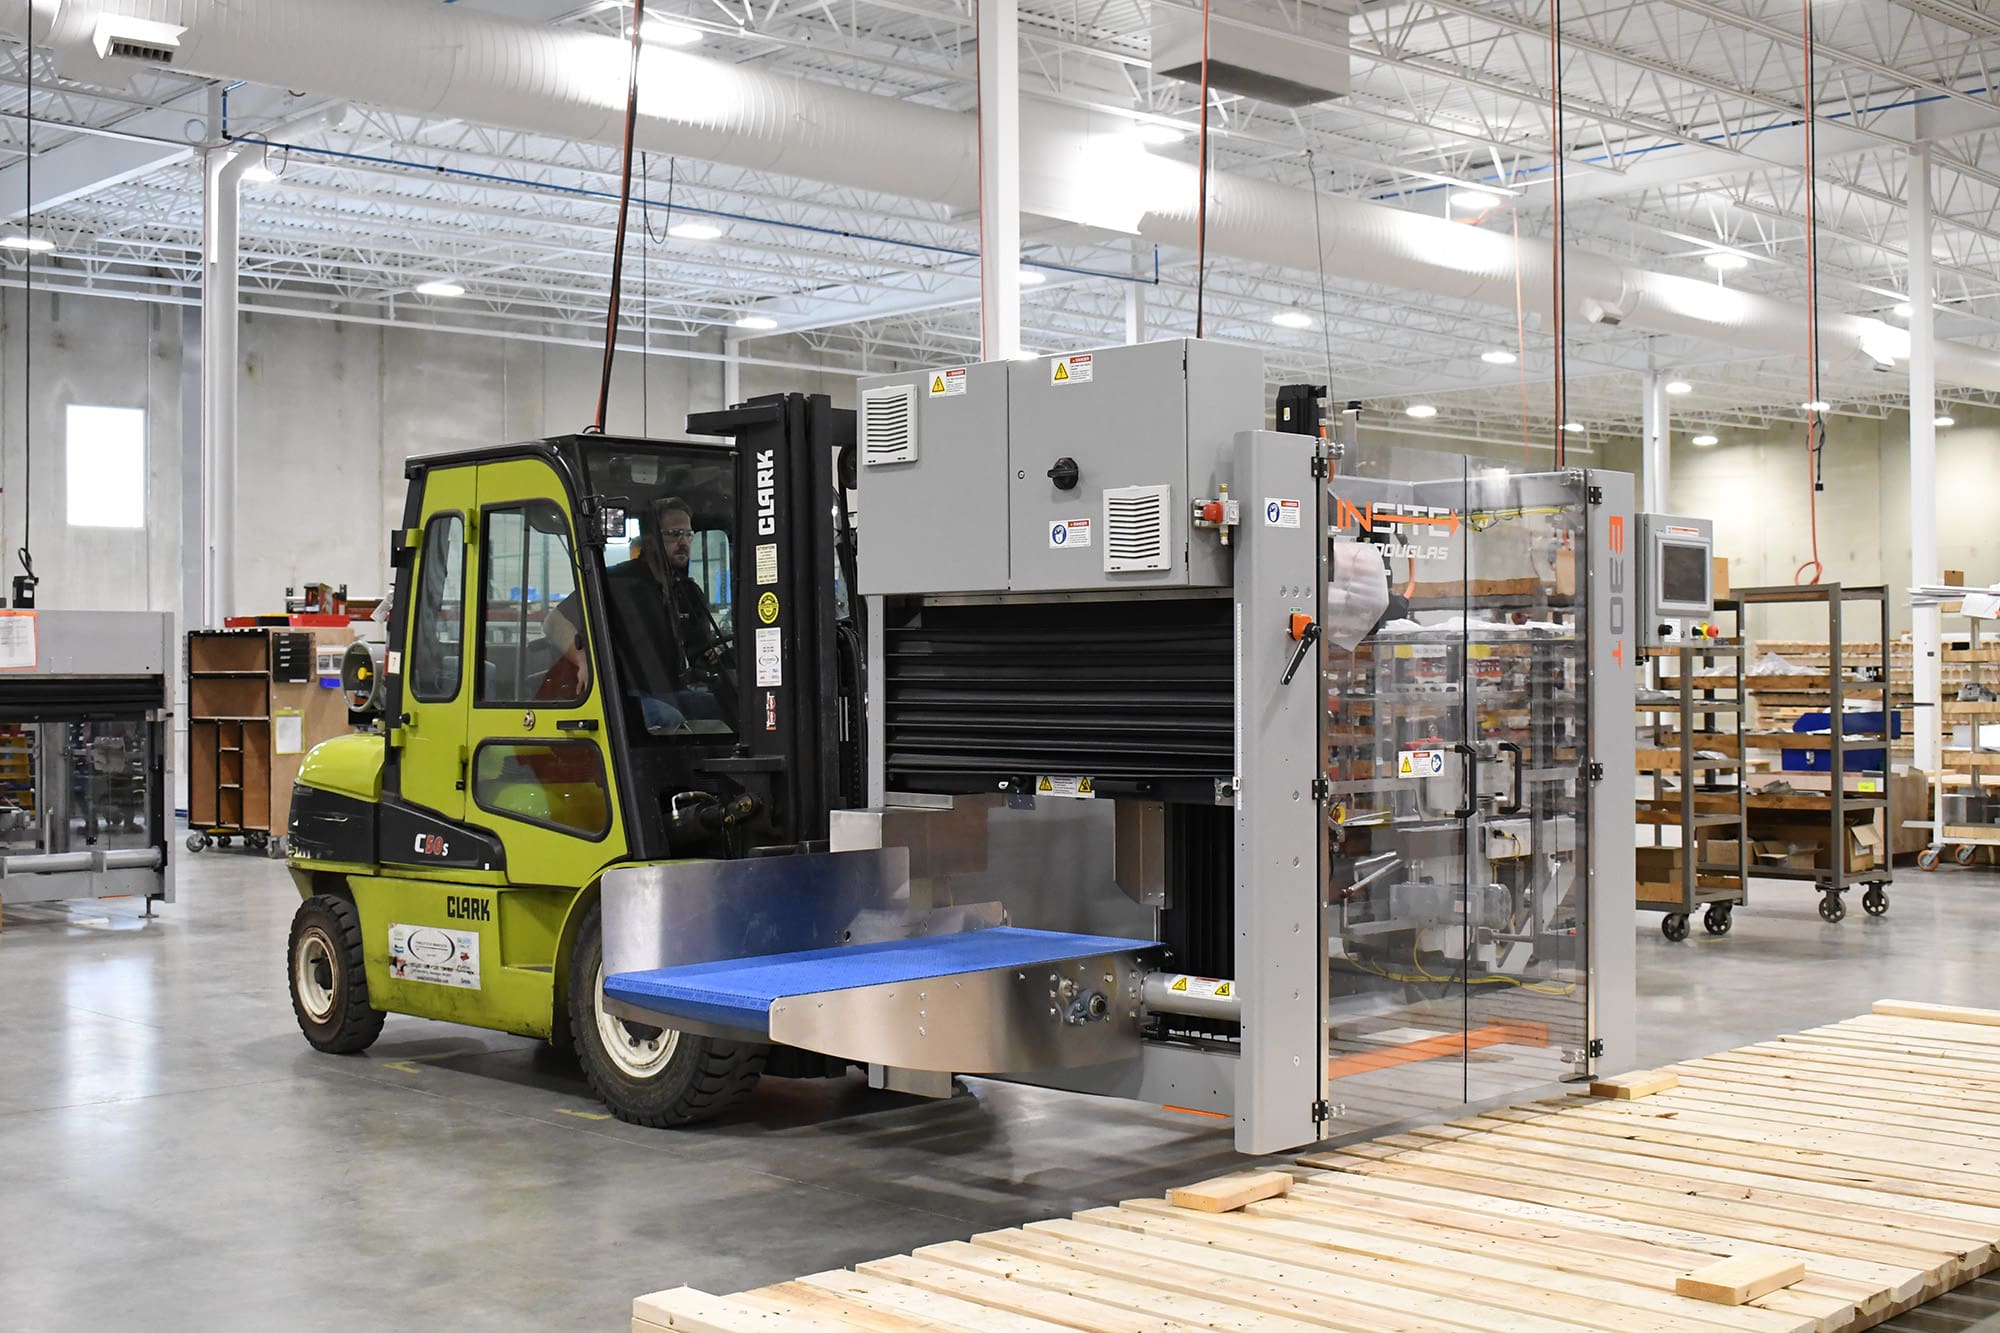
Step 1: Remove from Skid
10—15 Minutes
Important
The erector must be lifted from the non-door side with forks positioned under the orange temporary shipping bar (see Lift Points section, page 5 in your install guide/manual).
Step 2: Position and Level
15—20 Minutes

Step 3: Remove Shipping Materials
10 Minutes

Step 4: Connect Air & Power
30 Minutes

Assuming qualified personnel are on-site and the drops are ready:
Step 5: Power-Up and Robot Recovery
5—10 Minutes

Before powering up:
After power-up:
Step 6: Load First Factory-Tested Recipe
15—20 Minutes

Each machine ships with factory-tested recipes saved in the HMI.
To run your first case:
-
Go to Recipe Manager
-
Select desired recipe
-
Use InMotion Control Center for changeover guidance
-
Verify adjustment points (10 physical adjustments + HMI selection)
The HMI walks you step-by-step through each changeover point.
Step 7: Run Test Cycle
5 Minutes

From Machine Controls:
-
Press TEST START
-
Machine performs recovery and low-speed cycle
-
Switch to MACHINE START
-
Turn vacuum pump to AUTO to begin making cases
Total Estimated Time to First Case: 2 Hours
For most customers, you can expect to go from skid to running cases in roughly two hours. If it’s your first time, it may take slightly longer. After that, installations become significantly faster.
Self-Installation vs. Using an INSITE Service Technician
INSITE erectors are designed to be self-installed. But that doesn’t mean every facility should go that route.
Let’s break it down.
Cost of Self-Installation
If you already have:
Your only hard cost is internal labor and electrician time.
There is no required INSITE installation fee.
Cost of an INSITE Service Technician
Based on typical secondary packaging OEM rates:
-
Approximately $2,000–$2,500 per day
-
Typically 1 day minimum
-
Multi-day support (startup & training) can run $12,000–$15,000 for extended trips
This generally includes travel and on-site labor, but exact pricing depends on location and scope.
When You Should Consider a Service Technician
While not required, bringing in a technician makes sense when:
1. You Have Multiple Machines
Installing 3–6 machines at once? A technician can dramatically speed your ramp time to production.
2. You’re Integrating Multiple Systems
If you’re tying together:
Erector
Loader
Sealer
Conveyor Systems
Professional startup can streamline commissioning.
3. You Want Production Startup Support
A technician can:
-
Commission multiple case sizes
-
Fine-tune recipes
-
Troubleshoot corrugate variability
-
Train operators and maintenance team hands-on
This helps ensure you hit the ground running without nagging issues that slow production.
4. You Want Operator Training on Day One
While the HMI is intuitive, hands-on training accelerates adoption and reduces operator hesitation.
What to Expect on Your Installation Day

Whether you self-install or use a technician, expect:
-
A clear, documented process
-
HMI-guided setup
-
Factory-tested recipes ready to run
-
Minimal mechanical assembly
-
No complex programming required on-site
This is not a multi-day mechanical buildout. It’s positioning, connecting utilities, and validating changeover.
Final Thoughts
Is INSITE Erector Installation Simple?
At the end of the day, installing packaging automation can feel intimidating — especially if you’ve dealt with complicated systems in the past.
But INSITE erectors are engineered for straightforward setup, with:
-
Minimal tools
-
Standard industrial utilities
-
HMI-guided changeover
-
About 2 hours to first case in most facilities
If you have the internal capability, self-installation is absolutely realistic.
If you want speed, training, or commissioning confidence, a technician can accelerate the process.
Either way, the goal is the same: Get you making reliable, square cases — fast.
If you’re also evaluating how easy it is to change case sizes after installation, check out our INSITE Erector page to learn more about changeover and recipe generation. That’s where you’ll see how the machine truly performs day to day.
Your Next Step
Our team is happy to walk you through whether self-install or technician install is right for your facility.